Tuesday, November 3, 2009

Expressions Word Books

MOSD's Expression Word Books are so much fun! You can have them custom made in a variety of lengths with plain letters or new scalloped edges!


First lay out your letters how you want them to sit, trim as necessary.


Decide if you want to cover your letters with papers, with photos or a combo of both. Add the adhesive to the top of the letter & put your paper or photo on top. Trim with an Xacto knife (I sanded the edges to help hide any trimming imperfections :) ).


I punched holes in the chipboard letters with my crop-a-dile and used Spiral Rings to hold the book together and added some fun baseball ribbon!

As always, thanks for stopping by the MOSD blog! :)

Sunday, November 1, 2009

Tiny Baby/Tiny Book... Baby Book


I love all the fall projects we see this time of year.
They are filled with such lovely earthy colors!
But as life would have it,
a little miracle of pink or blue will pop up
amongst the array of earthtones.
Isn't that awesome of God?!
I so appreciate how His creativity is most colorful!
*
We had little "Emma" bless our lives last month
and I want to give her mom a little something
that is ALL GIRL
since she already has two boys that are more than all boy!
*

I created this little mini book from the center part of a
Perfectly Shaped Mini Scallop piece by MOSD.
I simply cut the outer parts of the piece away
which gave me a 3x(nearly)6" cover for my mini album.
My inside pages are 3x6.
I left them all this size so a teeny part of
each page would show when the book is closed.
*


I used my Cropadile to punch holes in the binding
and threaded ribbon through before tying with a knot.
The book stays closed with another piece of ribbon
which is secured under pieces of card stock
layered within the inside of the front and back covers.
*


May you be blessed by the many colors of
God's creativity today!
Wednesday, October 28, 2009

“BOOOOOOO--EssenseVibez in the Houzeeee Again!”


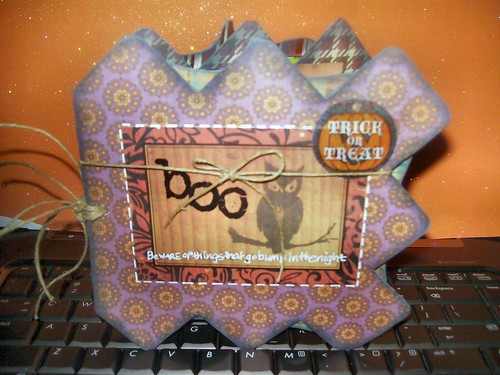
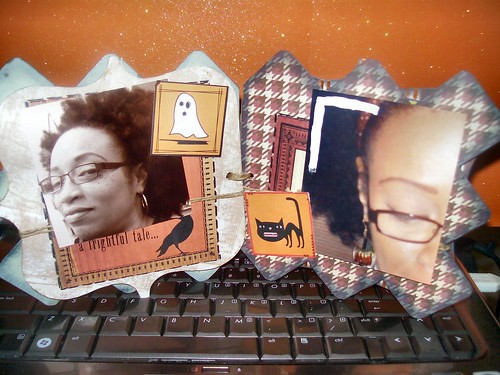
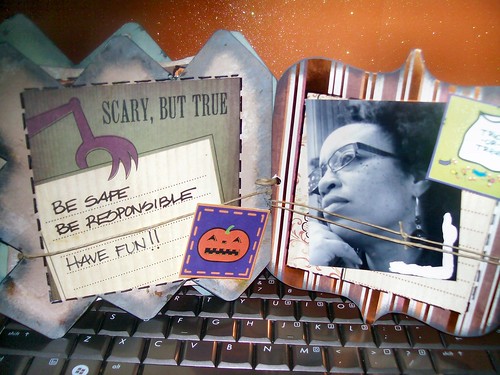
EssenseVibez in the housssssee!--and yes, it's my turn again to present a spooktacular project for you to enjoy--this minibook was designed for those who like to send grandparents or favorite Aunties Halloween/pumpkin patch photos---

I used various
Midnight Oil Perfectly Shaped chipboard pieces to build this book---I used patterned paper on one side of the chipboard and painted on the opposite sides of the pieces--Added cute lil' embellies with foam dots--Then added pictures and tied twine around the pieces and to hold the book together--


If you happen to make one of these books--We'd love to see it!


As always, if you’re interested in any of the MOSD products {which I know you are} go to the link located on the left sidebar and take a look at what they have to offer---Leave a comment and tell me what you think of my project—

Enjoy our other design team members creations as you peruse our blog--
Remain Blessed!!!


Tuesday, October 27, 2009

Awesome Sisters Mini Album

I had so much fun making this mini album that I want to give my sister as a gift. We don't see each other nearly as much as I'd like (you know, east coast-west coast living...). I can't wait to find the perfect pictures to complete the album. I used various sizes of the awesome chipboard shapes from MOSD. For the cover, I cut one in half so I could use it as an "open door" into the album.
I have displayed a few of the pages as the mini book opens. All in all, in addition to my cover, I used two 4 x 6 pages, one page with a scalloped edge, a page with a curved edge (kind of a "D" shape) and a 6 x 6 page for the back cover.
I was also happy to use some of my "stash" to decorate the book. I used various patterned papers I've had for a while, some Basic Grey Rub-ons, and some ribbon and flowers from my MOSD products. The "door knobs" on the front cover are from the dollar store. I believe they are supposed to be for jewelry making. I popped some small buttons on the front cover and covered them with the decorative metal pieces to make my "door knobs".
Oh yes, I also used one of the "clearly stated" quotes from my MOSD products, too.
Thanks for visiting and have a MOST WONDERFUL day!
Lori

Sunday, October 25, 2009

MOSD Meets Grunge...

Grunge board and grunge paper that is! I love Tim Holtz inks and grungeboard and other goodies. I just found out that there is now something called grunge paper, which is thinner than grunge board and I can cut it with punches and Spellbinders Nesties! So I went on a search to see how people were using it and got some fabbie ideas from the Studio 490 blog. I rolled all of this "research" into this one project!

I have been wanting to make this perpetual birthday list for a while now. I found the sheets for the inside online at some point in time - don't ask me where as I cannot remember! I had printed them and was just waiting for inspiration to strike! It finally did! Check it out!

I used the clear cover of a Long Haul album - which is 4x9 inches. Then I cut a chipboard sheet from a Big Boy album down to 4x9 to be my back cover. I lined up the holes for everything and punched all the layers with my Crop-a-Dile.

I used some Bo Bunny papers for the covers. For the front cover, I cut the paper a bit smaller than the acrylic so you can see the acrylic edge. Then I distressed the edges of the paper for that "grunge" feel. The title is something I printed on the computer. Then I cut it out with Spellbinder circles and inked it with some distress ink.

All of the flowers are grunge paper cut with Nesties or Sizzix dies, then inked with distress ink and over stamped with background stamps and Staz-On ink. The flourish is grunge board, also inked and stamped.

I added some vintage and sparkly brads and jewels for some pizazz. Inside the book are 12 sheets, one for each month. Here is the June sheet. There is a space to write names for each day of the month - to record birthdays. This is handy to sit on your desk or on a shelf. No more missed birthdays!

Supplies:
Paper: Bo Bunny
Stamps: Stampin' Up, PSK, Penny Black
Ink: Distress ink (spiced marmalade, dried marigold, shabby shutters, peeled paint, fired brick, worn lipstick), Staz-On (jet black)
Brads: Basic Grey, K&Company, Bazzill
Dies: Sizzix, Spellbinders
Birthday pages: downloaded from the Internet

See ya next month!

- Gloria

Friday, October 23, 2009

Tricks and Treats

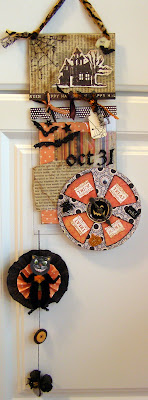
I am loving the holiday theme on the MOSD blog this month! I created this Halloween wall hanging using the largest and the smallest pages from the Clearly Designed Steps acrylic book. I secured the two pages together with ribbon scraps, which I tied through the existing holes.


For the top section, the smallest acrylic page was altered with crackle paint and brown Staz On ink. I stamped the spider web using black Staz On ink, adhered vintage paper to the back, and added the spooky house cut out and sparkly bat.


On the bottom section, I layered patterned paper to the underside of the acrylic page and added glittered stickers on the front.

The focus of the hanging is the Trick or Treat spinner. I created this using a spinner template from MOSD, which I covered in patterned paper and added embellishments and a Tim Holtz game spinner to the center.


Dangling from the bottom of the entire hanging is a rosette that I made with a vintage-style cat ornament (purchased from ebay), a couple of black and orange buttons, and a black flower. I just couldn't stop embellishing! Overall, the entire hanging is about 2 feet in length.


Thanks for looking! I hope you can scare up some fun projects for your Halloween treats this year.

~Erica

Thursday, October 22, 2009

Gobble Gobble!

Hello Everyone! It's Naureen with a fun Thanksgiving project. Well Thanksgiving is approaching quickly and I am starting to get organized, because I have lots of family coming to town. One of the things I love to do for my family is make place cards for the table. Usually I try to make some sort of turkey and this year I made a cute and fun turkey using the MOSD shaped cardstock pages. This was a really fun and easy project to do. This turkey is my prototype per say, but I hope to make a few more using some of the other shaped pages.

I usually don't measure when doing projects but here are some briefy directiosn to help you create your own turkey.


Supplies:

  • MOSD Shaped Cardstock Pages (Scallop)

  • 5 Sheets of Fall Colored Cardstock

  • Brown Paint

  • Glimmer Mist

  • Brown Ink

  • Circle Cutter

  • Scissors

  • Rhinestones

  • Adhesive

Directions:

  1. First you need to pain the scalloped cardstock brown and spray with Glimmer Mist.

  2. After the Glimmer Mist has tried, fold the scallop in half.

  3. Cut the turkey's body using a circle cutter. The body is 3 1/2 inches and the head is 1 1/2 inches. Ink the edges.

  4. For the feathers cut 4 1/2 x 3 1/2 inch squares. Flod in half and freehand cut the feather shape. Ink the edges and the fold.

  5. Glue the circles to the scallop one on top of the other.

  6. Glue the feathers behind the circles.

  7. To clean up the back and make it look neat, I cut another circle and place it over the feathers in the back of the turkey.

  8. Glue on rhinestones for the eyes.

  9. Cut a small heart for the mouth.

  10. You may write your names on or die cut the letters.