Tuesday, September 29, 2009

::BookWorm::

EssenseVibez in the Houseeeeeeee---coming to you with my project for the month of September---

Today I want to share a mini album I created for the bookworm in your family--Being an elementary school librarian, I try to come up with ways to help students keep track of the books they read for the school year--Be it index cards, mini notebooks or staple paper covered with construction paper--

This MOSD project is way cooler!!

After looking through my MOSD stash I figure using the COVER 2 COVER MINI FLIP would be the best choice to make this happen--Inside is sectioned to write down titles of fiction and biography books--There are extra sheets made from index cards for writing down extra notes--


As always, if you’re interested in any of the MOSD products {which I know you are} go to the link located on the left sidebar and take a look at what they have to offer---Leave a comment and tell me what you think of my project—

Enjoy our other design team members creations as you peruse our blog--
Remain Blessed!!!


~~Pam~~

Monday, September 28, 2009

Alex...and then there was you mini album

Now that I have 5 grandchildren, I've realized how many great subjects I have to keep me scrappin' happy for a very long time. The newest addition to our crew is Alex. He arrived in April, 2009, so it's about time I started an album just for him.

I just LOVE the MOSD chipboard sheets that are perfect for use in making mini albums. For this album, I started with 3 tabbed sheets and 3 square sheets. I trimmed the 3 square sheets to 5" w x 6" h so that the tabbed pages would extend past the edge of the "non tabbed" sheets.

Then I trimmed two of the three tabs from each tabbed sheet, leaving 1 top tab, one middle tab, and 1 bottom tab.

Then I went to my stash and pulled out my collection the Basic Grey "Granola" line...perfect for a boy themed book:) I found I had the "perfect" striped ribbon from SEI and a sheet of vellum quotes that I've had for YEARS!...so glad to be able to use them.

Of course, for those of you who know me, I can't complete a project without "grunging" it up. I used distress inks and a blending tool to grunge up each page edge as well as the vellum quotes I used. I was also happy to see I had some great buttons in my stash that worked perfectly for this project.
I also used some of the frames from my MOSD stash...I just LOVE these! Last month I used them to make some awesome cards and was able to incorporate them again this month. The reason I love these is that they are so easy to alter. I used Staz on ink on the one above. On those below, I used rub-ons, ribbon and some small buttons to spruce them up. Also below, I popped one up off the page so that I could "interlock" it with the second frame. I received SO MANY awesome colors in these frames! I'm sure they will be a staple in my future projects as they've been already.

I just showcased a few of the pages in my mini album. For a peak at the entire album, click here.
Thanks for visiting:)

Friday, September 25, 2009

Halloween Decor

This is the time of year when I start getting out my fall and Halloween decorations. I don't have a lot of Halloween things and most things I see in the stores don't appeal to me. So, a few years ago I started to make things. Every year I make one new item for fall/Halloween and one for Christmas. It's been fun to do, and while not all of the creations make "the cut," I still enjoy the process.

This year, I decided to dip into my MOSD stash to make a wall decoration. I used the clear cover from a Big Boy album as my wall hanging. The Big Boy album is 6x12 and comes with 2 acrylic covers and 6 chipboard pages. I rounded the corners of the acrylic with a Round-it-All, and then inked the edges with jet black Staz-On. (click on the photo to see a larger view)

I covered the acrylic with My Mind's Eye dot paper. I distressed the edges a bit. Then I covered a Basic Grey chipboard bracket with Making Memories paper, and attached the bracket to the top of the acrylic with brads. The Crop-a-Dile punched the holes very well. I can use the bracket to hang the panel onto the wall.

I cut a strip of My Mind's Eye bat paper and punched one edge with a Martha Stewart punch, then I distressed the other edges.

I printed a calendar on the computer and matted it with some cardstock. I used some ink to grunge it up a bit. The black cat is a MOSD Halloween Stick-Ons. I also used a clear button on the 31st to highlight the date. You can also see that I used a grunge board hinge (on the left side of the ribbon). I first inked it with jet black Staz-On and then added some black diamond Stickles. It's attached with the mini brads I got in my MOSD DT kit. I used the smallest Fiskars anywhere hole punch to make the holes. It cut through the acrylic very easily, and makes tiny holes for the mini brads.

The art at the bottom of the panel is a vintage postcard that I printed from the Internet. I've had it in my stash awhile so am not sure where I got it. It's very similar to the ones Daisy D's had a while back.

I also used some black pom-pom trim at the bottom of the panel. This was a pretty simple project and made great use of an "orphan" Big Boy cover.

Hope you have the time to make some home decor projects. I'd love to see! See you next month!

- Gloria

Wednesday, September 23, 2009

Back to School with Intricacies

I love new school supplies. New paper, pencils, and glue sticks. Unfortunately, I have no real "need" to buy these supplies. I've been out of school for more years than I care to remember. I don't have children in school. But who doesn't need new paper, pencils, and glue sticks?

For this post, I've highlighted some of my new supplies. I "borrowed" a couple of kids from a friend just so I could show off Midnight Oil's 1-2-3 Intricacy. I altered the intricacy to make it match my layout and to make some of the numbers really stand out. I painted them using ordinary craft store acrylic paint. I quickly brushed on white paint, then black paint. I used the end of my paintbrush to add bright yellow circles. Once the paint was dry, I added bling with golden yellow sequins.


I mounted the photos onto yellow cardstock and added some of my new school pencils.


Thanks for looking!
ERICA

Tuesday, September 22, 2009

Layout Information Storage

Hello Everyone!

Well I decided that I need a better way to store my layout information, so I came up with this neat idea after looking at some suggestions on other websites. Since I post so many layouts on various websites I needed a way to keep track of the supplies and materials I used on each layout. I used to write the information on the back but I hated pulling layouts from protectors to view the information. So I decided to make a little "layout notes" mini album. The idea is to write the information on the index cards as a quick reference guide. Enjoy

Here are the materials I used:
  • MOSD 4x6 Chipboard Album/Rings
  • MOSD Stencil Stickers
  • 3x5 Index Cards
  • Scenic Route Pattern Paper and Stickers
  • Dress It Up Buttons
  • Ribbon - Offray
  • Ink - Versa Color
  • Mini Letter Stickers - Making Memories


Monday, September 21, 2009

Stick On Cover Ups - Flower Garden


I am a flower nut when it comes to scrapbooking. (Real flowers though are another story. I hate to garden and I can't seem to keep the houseplants alive either). When deciding what project to work on this month, these Flower Garden Stick Ons immediately caught my eye. These were extremely easy to use and when I decided I didn't want the flowers straight up and down, I curved the stems without any problem. I also added a chipboard circle and pearls to their centers. Although I chose not to alter the color on these, you can easily use alcohol inks, pens, paints or markers to change their color and appearance. I even have 2 left over for another project!

This is a picture of me and my daughter Emma (who just turned 7 last week) this summer at her first concert - Taylor Swift and Keith Urban. She loved it and stayed awake almost the entire time!

Friday, September 18, 2009

The Acrylic Shuffle!

Hi everyone! I am enjoying all of the awesome projects from the MOD SQUAD!! I hope that they are inspiring and motivating you to get some great MOSD products and create! This month I decided to do a mini album. I took a look at my MOSD goodies and chose the Clearly Designed Steps acrylic album. It comes with 3 plastic black rings and 8 clear pages that range in size from 4x5 in. to 7.5x5 in. I took a look at this album and thought about mixing it up! So my album is not in steps, but it is a cute mini!! The theme is for a baby girl and this cutie is my niece. I had the opportunity to create some birthday party goods for her 1st birthday! I thought I would surprise her mom with a cute mini of her pictures!

This mini has a total of 5 pages. 10 pages front and back. I challenged myself to really make the "clear" pages stand alone. I did not use any cardstock or patterned paper. For each of the pages I used rub-ons and Journal Bits from MOSD. I embellished with flowers, ribbons, stickers, and brads. Oh and the cool part was that I did not use any adhesive!! The pictures are adhered to the pages with eyelets! This mini reminds me of a picture frame but with 5 different pieces!


Be sure to head on over to the MOSD website to check out all of the cool products!! Don't forget to visit the MOD SQUAD design team blogs for endless amounts of inspiration and creative ideas! Thanks for stopping by! See ya next month! :)

Thursday, September 17, 2009

Growth Chart

Hello Beautiful People! It's Amy again. I am so excited to be back this month to share with you a project that I absolutely adored making. This project was inspired by my son. I was just looking at him and reminiscing about the days when he was a truly a little baby...and man, has he grown!!! So that made me want to create my little one his very own growth chart and MOSD has SO many fabulous products that made this project just come to life!

Photobucket


For this growth chart I used various wonderful MOSD products. For the base of the entire chart I used the Clearly Designed Flipped Out Acrylic Album, using only the inner pages and back cover. I trimmed down the back cover to be the same size as the inner pages so I would have 5 uniform acrylic panels.

I then started to decorate! I used Basic Grey ‘Lime Rickey’ collection because it blended so well with the fabulous MOSD 1-2-3 Intricacy that I used to back a few of my acrylic pages. To adhere the papers to the acrylic I simply used Mod Podge!

One of my favorite things that I used on this Growth chart was the MOSD Toddler Boy Edger. I cut it apart so I had multiple little vehicles to play around with and added details with a pen. Easy and fun and Oh so CUTE!!

Then there are the Oh SO fabulous MOSD Binding Rings that hold this bad boy together. I chose to use clear to keep in theme with the Acrylic! If you do not have any of these binding rings then they are definately a MUST have item! Simple and easy to use and just wonderful!!

As you can probably tell my DS loves cars or as he calls them 'carsh'. And I just love it when I get to combine a passion of someone I love with that of my own! As sad as I get that my little man is growing up I will always have little things like this to remember his 'younger' years! Which is, afterall, The main reason I scrapbook!

This was my first time working with Acrylic and I absolutely loved it!
I am now a believer :-)
Thank you all so much for stopping by today to check out what I have been up to. Make sure to keep checking back to see what the rest of the FAB DT has been creating!

PeaceOut-ScrapOn-LoveAlways
Amy

Tuesday, September 15, 2009

Acrylic Card

I am into acrylic cards lately. Mainly because they are sturdy and because they are transparent you can have some fun. First I cut my acrylic into two pieces and I used regular scotch tape to attach the two pieces then added a PP inside to hold it strong. I used acrylic paint in two colors at the bottom on both sides. I added PP, ribbon & embellishments. What's great about MOSD acrylics is that they come precut so you don't have to worry about cutting them. TFL!

Sunday, September 13, 2009

Needed to get organized!!

Hi everybody! Vicki here again!! Are you just loving all these projects the design team has been showing you?!?! They're fantabulous.

I am here today with a relatively simple project, but to me - ULTRA IMPORTANT! I have recently dipped far into the digital side of scrapbooking - and I am loving it! However, I am on several teams and there's a lot of stuff to keep track of, so I needed a way to keep track of it all and obviously I wanted to make sure it was going to be sturdy. MOSD to the rescue!!

Ain't it cute?!?! This uses the MOSD CLEARLY DESIGNED SHOW OFF Album! There are actually four pages included, so you can use this album in accordian style or truly as a four page mini album. I, however, only used two pages and used them as a coverset for my CT book!

I used the MOSD Spiral rings in order to bind my book together and they are great!! They are plastic, but like a keychain ring, so it makes it very easy to add or remove pages!

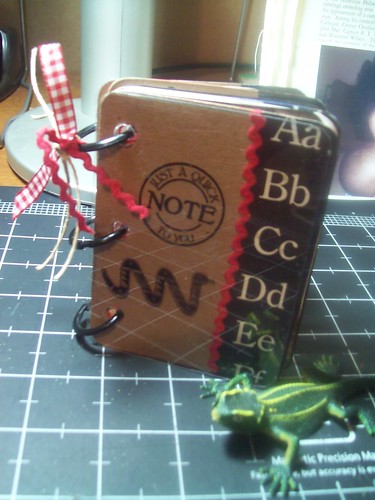
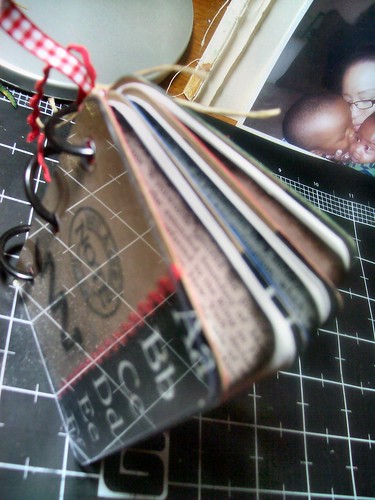
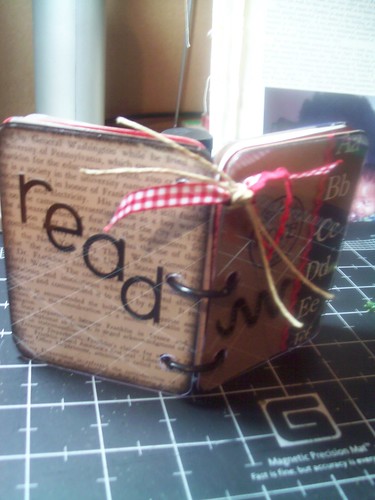
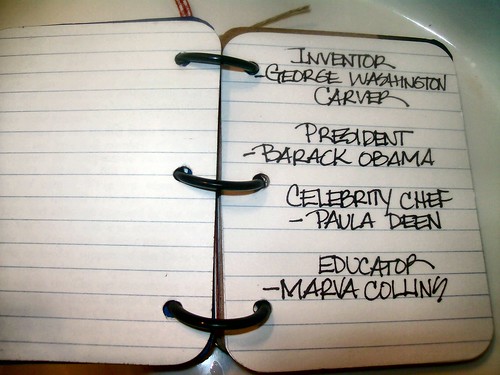
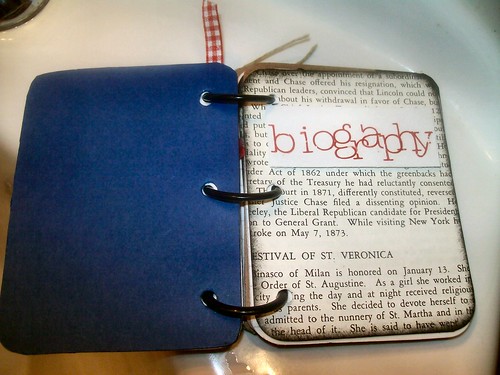
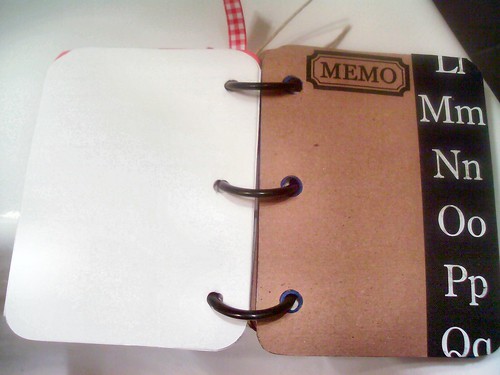
These are my organizational pages - you happen to be looking at a blank one - I also have them customized by team, depending on the team's requirements.

Think of all the uses for this little album! Again, I only used two pages, so I could very easily make two books - my CT book and then perhaps a recipe book, a prayer book, and address book...the possibilities are endless! I also believe this is the perfect size for Index Cards! How easy would that be?? My daughter has a teacher who requires index cards for their notes/studying!

The inside cover was decorating using a digital kit, as were the pages. The little robots - I Love You a Bot kit belongs to Nikki Boudreau and the pages belong to JM Designs pm kit.

Again, it's a simple project - but very useful and it hasn't left me since I created it!! I carry it with me everywhere and actually needed to make some notes so I jotted it down on the back of one of the cards - tells me I need to add extra note pages!

I hope you like this little project and if it does nothing more than inspire to you create one of your own - my job here is done!!

Tuesday, September 8, 2009

How Time Flies!

WOW! I can't believe here we are in September already! Time just flies by! So fast that my little guys started Preschool for the first time last week! Which had me thinking I needed to come up with a good way to preserve all these precious school memories for them. So I got an idea and started searching my box of Midnight Oil products and came up with the idea to create this awesome book to document every year for them. So I grabbed a bunch of the the Perfectly shaped build a book pieces, some Intricacies, some KI pattern paper, Making Memories mini glitter letters, DoodleBug buttons, and my trusty Zip Dry glue. And here is what I created!
I created a page for each year from Preschool through High school and I will fill out the info page which I typed up and printed out for each year, and at the bottom is a place for my son to write his name at the start of each year. The next page is a place to put a copy of the class picture each year. I kept the embellishments simple to not take away from the info and the pictures. The image on the front cover is from Cheeky Radish designs and I used my Copic markers to color it. I had fun just mixing all the different shaped pages together and just making it fun and funky!

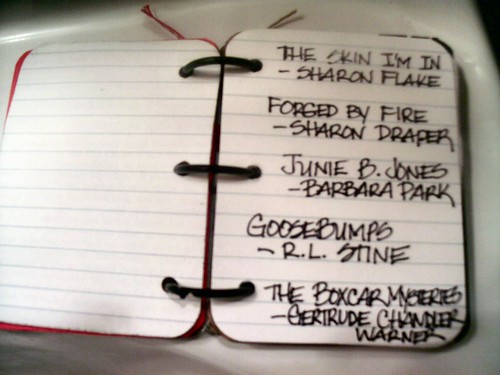
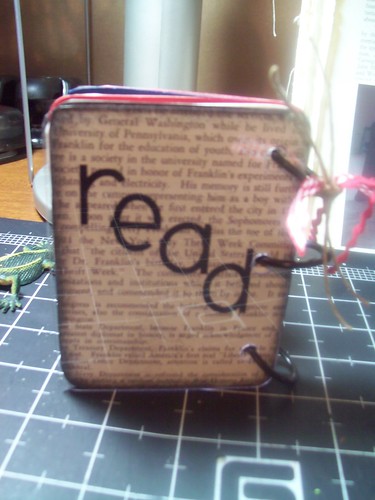
OK I think you get the idea and I don't need to show all the pages. LOL! So go grab your supplies and make one for your special someone!

TFL!

Valerie

Saturday, September 5, 2009

Inside the Can-O-Back to School

And here is all the "Back to School" goodness inside the can!
Fun stuff, huh?!
*
A couple of days ago, I shared with you my
"Can-O-Back to School" here on the MOSD blog.
Here is the can in case you missed it...
*
Just an ordinary veggie can recycled (gotta love THAT!)
I removed the BOTTOM of my can so the top
still has the "pop top" in tact.
Tied some ribbons to the top and
once it's "popped," the can can act as a pencil holder!
LOVE it!
*
Now... for the goodie goodness inside the can...
*


I'm so excited about this bookmark and these magnets!
I used the "Build a Book Perfectly Shaped Mini Sawtooth"
by (well, of course) Midnight Oil Scrapbook Designs!
I just cut each section until I had all my little pieces.
Only ONE Mini Sawtooth piece was used
for all the projects you see in this post.
*
Again, using one of my trimmed pieces of the
Mini Sawtooth Build a Book piece,
I scored it in 1/2 to create a sturdy lil magnet bookmark.
*
Now, for this bookmark... look closely.
The STAR is one of the PUNCHED STARS
from my STAR INTRICACY by MOSD!
After punching them from the intricacy,
I spritzed on some bling, and used them as embellishments.
Waste not want not!
*
And quite possibly my favorite piece of the can...
My "Cover 2 Cover Petite Acrylic Album"
by Midnight Oil Scrapbook Designs!
These are the CUTEST little things I think I've seen!
And it was so fun making this adorable little book!
What fun it will be to give it away!
*
Since my daughter had about
1/2 of her friends go one way for Jr High and
the other 1/2 go with her to another school,
I know she is going to be missing those she won't see
each and every day at school.
This little book has pics of all her buds she might miss
(and a couple of the ones she will still be with.)
She can hang these "Locker Notes" of friendship
in her locker and keep her friends close to her heart.
*


By keeping my designs somewhat simple,
I was able to create a ton of little goodies very quickly.
You don't have to pour each and every supply
into one project to create a heartfelt keepsake
as long as you pour your heart into creating it!
Blessings,